How to take photos of nature - forest landscapes
Discover our photography top tips
Forest Landscape Photography
Taking a dramatic image of your forest surroundings is a fantastic way to capture your holiday memories of your hot tub paradise, and whatever the weather, whatever site you visit, our forest sites are guaranteed to provide you with a fantastic photo. Here, Paul gives his tips for taking great photos of the forest scenery.

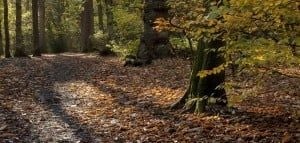
An autumnal forest trail
Preparation and Lighting
Take your time. Thoroughly investigate any location you intend to photograph before you get your camera out. Explore for a while and consider all the different angles before you decide on your final composition.
Find the right light. The quality of the light is one of the most important factors in creating any image. Light quality varies during the day, more so in summer when the days are longer and the sun is higher in the sky. Generally the quality is at its best in the first and last few hours of daylight.
Use shadows. Shadows can play a key part in any landscape image and add drama and depth. Think how they will move and lengthen or shorten during the day and plan your time around when they’ll appear to get the best effect.
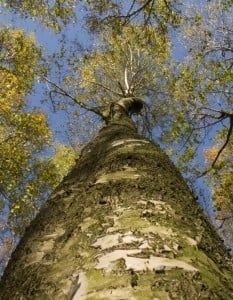
Looking up to a birch tree
Angle and Position of Camera
Try unusual angles. Shoot your photograph close to tree trunks to create the effect of towering giants or use a wide angle and shoot directly skywards to show the canopy. As with all your images make sure you consider the composition and balance within your image.
Get a star burst effect. If it’s sunny try to use the sun shining through a leaf or at the side of a tree trunk to create a star burst effect. The best way to do this is to get the sun behind a trunk and move slowly with your camera until it just peeks round the corner. It only needs to just touch the edge of the trunk. Vary your F number until you get the effect you want.
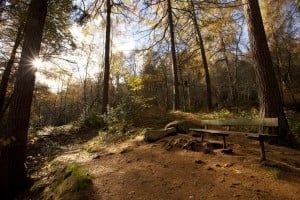
A peaceful woodland scene
Photo Composition
Play with composition. Composition is important in landscapes. Think about the sky and if you are going to include it. You can get some much more creative shots if you avoid having the horizon straight across the middle of your image. Sometimes a point of focus in front of the image, say a fern or mossy rock, helps to lead the eye into your landscape.
Go panoramic. Panoramic images can be very impressive. First check that your camera has a panoramic setting. Most iPhones even have the option, flick through to ‘Pano’ when you open your camera and learn how to steadily move the camera as you take an image. If you don’t have a panoramic option on your camera, you need to shoot a sequence of images, say five, across the landscape you are working with. Each shot must overlap with the previous one by a small amount, roughly 10%. The best way to do this is to use a tripod and swing the camera round using the tripod head. Make sure the tripod is level first. You create the panoramic effect by using a computer programme which blends the images together. You can buy a free standing programme or you may find that your editing programme has a panoramic mode within it.
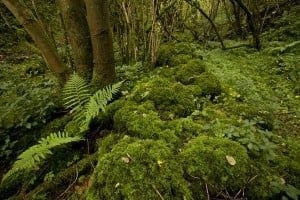
Mosses and ferns on the forest floor
Camera Settings for Forest Landscape Photography
Increase your ISO and use a tripod. Most landscape images are shot at high F numbers like 16, 22 or 32 to create a big depth of field. You may have to move your ISO up to make sure you get a good speed if you handhold your camera. Better still though is to use a tripod. This adds greater stability to your camera and allows slower shutter speeds without blurring the image. Tripods are also great at helping you refine and tweak your composition.
Using HDR. Contrast in landscape images can be very high and difficult to control, especially in dark woods with bright skies. Check if you camera has a HDR (High Dynamic Mode) setting. If it does, read your manual and learn how it works. If it does not you can still do HDR images. You need to shoot the same scene 3 times. You must have the camera on a tripod and it must not move at all between taking the 3 images. One image will be taken at the correct light reading, the second at -1 underexposed and the third at +1 overexposed. Your editing programme may have a HDR mode within it. Use this to blend the 3 images, the effects can be really dramatic.
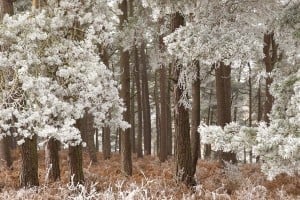
A frosty winter forest
Best Lenses for Forest Landscape Photography
Using a landscape lense. The best landscape lenses tend to be the smaller ones, depending on whether your camera has a crop factor sensor (most do). Choose a small zoom, say 16-35, 17-40 or 24–105mm. A 70-200mm can be an effective landscape lens but it’s always a good idea to have one that allows a wider angle approach as well.